How to Safely Pack and Ship Your McIntosh Gear: A Step-by-Step Guide

Packaging McIntosh gear involves a few more steps and careful considerations than most other HiFi gear. In this packaging guide, we’ll help by explaining:
- Overview of all the tools needed
- Preparing accessories
- Bagging
- Stretch Wrapping
- Attaching Manuals
- Secure Cables and Remotes
- Placing protection and pads
- Sealing and double boxing
McIntosh is one of the oldest and most beloved brands in the audio industry. Whether you’re sending your McIntosh amplifier in for repairs or selling your used McIntosh preamplifier online, anyone who has had to pack or ship a McIntosh unit knows that it can be a bit tricky if you’re unfamiliar. As striking as their signature glass faceplates are, they’re equally fragile and liable to break if not properly protected during shipping.
Luckily, McIntosh, with their American muscle, also has some of the strongest and most well-designed packaging. When complete factory packaging is used correctly, it will be more than enough to ensure your amp ships safely. We wanted to share the best practices for shipping used McIntosh amplifiers that we’ve learned from years of experience and thousands of used McIntosh units sold and shipped.
Overview of tools needed
Before you begin, make sure that you have all of the materials listed below, including the complete factory packaging and packing diagram. Packing diagrams are found near the end of the user manual for the vast majority of McIntosh units (though not available for some older units) and also include a parts list. This will help you make sure you’re not missing any pieces of the packaging. If you no longer have your manual, you will likely be able to find a copy online.
- Your unit’s complete factory packaging
- A couple of plastic bags
- Stretch wrap
- Socket wrench
- Tape
- Packing Diagram (found in user manual)

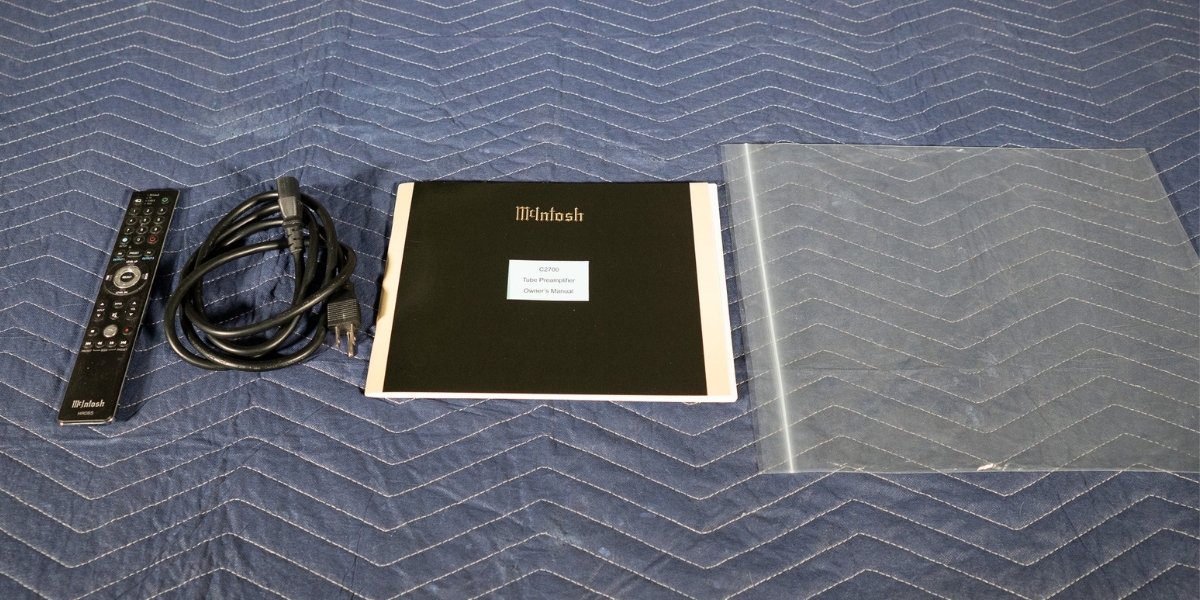
Step 1: Prepare Accessories
It's important to make sure that any accessories you’re packing with the unit are properly secured so they don’t bounce around inside the box and cause damage. For now, make sure to inventory and confirm you have all of the accessories together.
- Bag the manuals, flat documentation, cables, and remotes separately using small plastic bags.
- Set these items aside for later placement.
Step 2: Bag the Unit
To protect the finish, put your unit in a protective bag before proceeding. This helps avoid any scuffing, rubbing marks, or other damage to the finish during packing and transit.
- Place the unit in a protective plastic bag.
- Position the unit in the bottom cardboard base/bottom pad of the box.
Make sure the feet are installed on your unit before placing it in the bottom pad, as these ensure it’s oriented correctly and hold it securely. Make sure that you have the unit facing the correct way in the bottom pad. There will be space for the faceplate and knobs on one side.
TMR TIP: Make sure the unit is not packed backward or without enough space for the faceplate and knobs. The glass will be damaged during shipping. If you no longer have the original protective bag, you can use Saran Wrap around the unit instead.
Step 3: Stretch Wrap the Unit
Once in the protective plastic bag and properly placed in the bottom pad, use stretch wrap to further secure the unit to the bottom pad.
- Begin wrapping the unit with stretch wrap, starting with the sides and then going over the top and around the bottom pad to hold them together.
- Ensure a snug fit to stabilize the unit.


For Heavy McIntosh Units:
With a heavier McIntosh amplifier, such as the MC462 stereo power amplifier, your packaging will include a wooden skid to further secure the unit inside the inner carton. It is important that you use the included screws and washers to bolt the unit to the wooden skid, or shipping damage will occur.
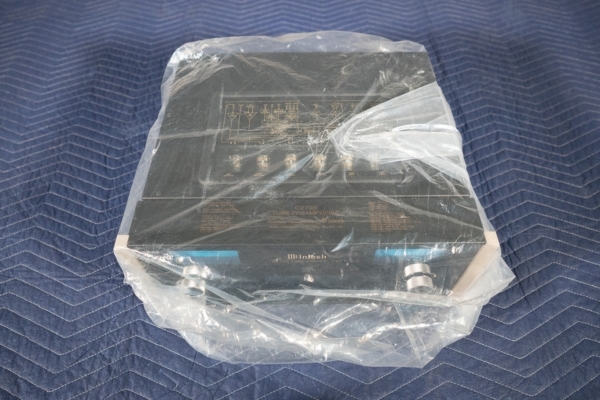
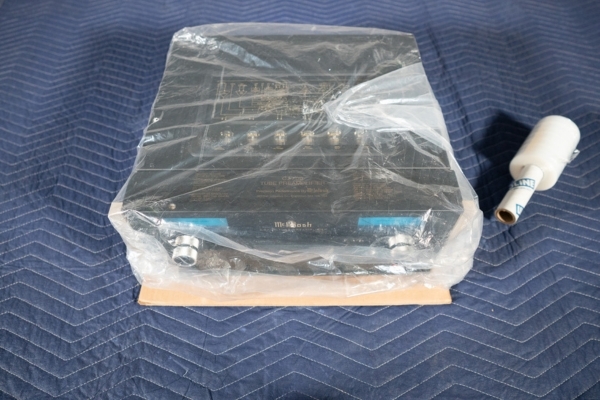
- Bag the unit as usual, then flip it upside down to mount it to the board (be sure to take out any exposed tubes before doing so)
- Follow the standard packing process for the rest of the steps.
- If bolts are used to secure the unit, you can skip stretching-wrapping it to the bottom board.
TMR TIP: If you’re missing any screws or washers, check the packing diagram for sizes and part numbers. You should be able to order replacements from McIntosh if needed.
Below are images from left to right (Item flipped upside down in protective plastic bag, Item getting ready to have board mounted, item with the board mount on it)


The left image shows the front of the unit on the mounting board. The right image shows the back of the unit on the mounting board.


Step 4: Attach Manuals to the Stack
As mentioned above, it is important to make sure all accessories are completely secured so they do not move around during transit. Since the manuals and documentation are thin, flat, and light, they can be secured to the top of the unit using more stretch wrap.
Wrap the bagged manuals and documentation and secure them to the top of the unit stack with stretch wrap.
Step 5: Secure Cables and Remotes
Any cables and remotes are too large to go on top of the unit and would get in the way of the top pad and damage your unit if packed there. Make sure to pack these separately from the manuals and documentation.
There will be a triangle-shaped space created by the stretch wrap behind the unit that is the perfect spot for these accessories. Make sure they are packed behind the unit and not in the front next to the faceplate, as this will damage or shatter the glass.
- Locate the triangle-shaped space created by the stretch wrap and insert it behind the unit.
- Securely wrap the cables and remotes and place them into this space.
TMR TIP: Make sure accessories are all fully secured and will not move during transit. If they can move, they can damage your unit.

Step 6: Place the Top Pad
As with the bottom pad, it is important to make sure the top pad is correctly oriented. One side should have a small ridge. This will go in the front behind the faceplate to protect the glass, and the rear should have a flap that drops down over the back panel. Making sure the top pad is oriented correctly will protect the faceplate and keep the unit from sliding around.
- The top cardboard or foam pad is critical for protecting the unit, especially its glass faceplates.
- Place the pad tightly against the top of the unit, flush with the front of the box.
- Double-check the placement to ensure proper protection.

Special Note for McIntosh MC275 Tube Amplifiers:
The MC275 stereo tube power amplifier requires a little extra care to ensure it ships safely. Since this unit has external tubes, make sure to use the foam tube insert inside the tube cage. This will make sure the tubes are safe and secure during transit.
-
Handle McIntosh 275 units with extra care.
- Make sure the Foam Tube Insert is used to protect the tubes inside the tube cage. See the user manual and packing diagram for more info.
- The screen-printed text on the chrome is delicate and can rub off easily. Avoid cleaning or touching this area unnecessarily.
TMR TIP: The chrome finish and screen printing are also delicate. Make sure to handle it with care. Avoid unnecessary contact with the screen printing. Especially, as this can rub off easily.


Step 7: Seal the Inner Carton and Double Box
Once the top pad is secure, tightly close the inner box and secure the flaps with tape. This is important to making sure the top and bottom pads are secure within the inner box and will stay in place during transit.
- Close and secure the inner box with tape
- Pack the inner box in the outer box using the included foam inserts


Most McIntosh units will include an outer or double box, along with foam inserts to keep the inner box secure. It is important that the double box be used if originally included. Check your user manual and packing diagram if you’re missing it or are not sure if your unit had one originally.
TMR TIP: Even for units that did not originally include an outer box, it is still a good idea to double-box before shipping. This will help protect not only your unit but also the packaging so it’s in good condition for future use.
By making sure you correctly use the complete factory packaging, you will make sure your McIntosh gear stays safe during shipment or moving. Make sure to bag your unit to protect the finish, properly orient and secure the top and bottom pads or shipping skid, and fully secure all accessories. Tightly seal the inner box with tape to keep everything in place, and double the box for extra protection.
Follow the packing diagram in your manual carefully, and you’ll avoid the dreaded broken faceplate glass.
Don't have the original factory packaging? No problem. If you choose to sell your gear with The Music Room, we have a growing supply of real McIntosh factory packaging to get your gear here safely. Get started selling your gear with The Music Room now.
Sell Your Gear The Easy Way
As lifelong audiophiles ourselves, we believe selling your gear shouldn't be complicated. That’s why we've created the most hassle-free service that takes care of every detail for you. So you don't have to. You can avoid the risks on marketplaces and still get top dollar with The Music Room. Get your free quote by starting our easy-to-use online form.
Get Started